Chalkboard Key Rack

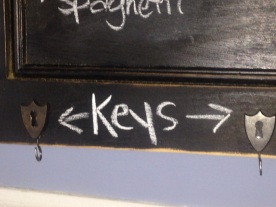
Had lots of fun making this one – it’s been one of those things I stared at for a really long time with plans for my house – but what I had it mind just didn’t work for my space, so I made something for you – wish I had a kitchen wall big enough for it!

Chalkboard Key Rack

Chalkboard Key RackChalkboard Key Rack

It can be yours  – Just visit Etsy.

No Sew T Shirt to Dress – again!

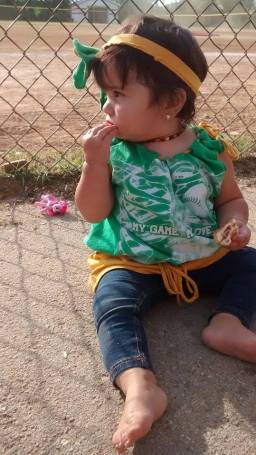
We did it again!  Because there are just far too many adorable little sisters rooting for their big brothers –  
Angelstshirtdress    Angelsshirtdress2

This little cutie has a brother playing for the As – so I scrounged up some t shirts in the right color, pulled up a comfy chair at baseball practice and starting snipping…shout out to my baseball moms for your input!

So, here’s how you get there – 

Choose your shirts – the bodice shirt should be a good imagefit or close to – it’s ok if it’s a little baggy – but if it’s too big, you’ll need to go a different route with this – which could also be done without sewing – comment if you do, and I’ll help you get there 🙂 – but let’s stay focused…
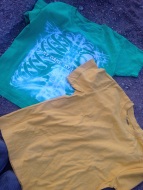
The how to is a bit wordy – it’s really easy and quick, though, promise 😉

Take your t-shirt that you will use for the skirt part of the dress and chop it off – just below the armpit.  Don’t worry about the length for now.

Cut a long strip off the top about 1-2 inches wide – what you will do here is start, circle around once (only cutting through one layer at a time) – don’t meet your starting cut with your finishing cut – you are going to taper down a little and go around the shirt again so that your ‘ribbon’ is three to four times the circumference of the shirt – you need a long enough strand to wrap around the waist of the child and tie bow, one strand to go around the imageneckline and tie a bow, and two strands long enough to go around the arm holes and bows on the shoulder.  If anyone needs help with that, I will gladly do that again and get a better visual of that for you.  I’m sure that I can find a reason to do this again :)…

You can cut a little length off the top of your skirt, or save that until the end and cut length off the bottom.  Raw edges are good…

Cut the neck-band and sleeves off of your bimageodice  shirt. You can also cut the hem off  so that you will have a raw edge.  If your shirt is bigger, cut the shirt to length you want it…
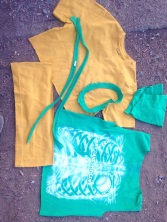
Cut horizontal slits in at the bottom of your bodice, and coordinating slits at the top of your skirt.  It’s probably ok if they are vertical slits, but less chance of ripping with horizontal.  Your slits should be just wide enough to slip the ‘ribbon’ through, and mine were about 2-3 inches apart from each other.

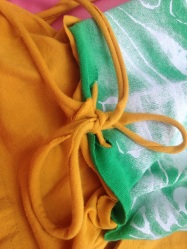
Turn your ‘skirt’ inside out, tuck it inside the bodice, so the top raw edge of the skirt meets the bottom raw edge of the bodice.  It’s wrong in the first picture – that’s how I started (right side to wrong side), but changed my mind.  So, you can see what not to do :).  For yours, wrong sides should be together. The wrong sides (like the second picture) together creates a cute little trim/gather when you are finished…
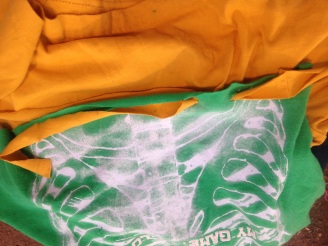
image image

Start in one of your front center slits (I had them slightly off-center, so the bow will fall in the center.  Thread your ribbon in first so there is a strand hanging out the front. Thread alternating in and out until you meet back up in the front to tie a bow – if you end up a slit short – just snip another one :).  Gather a bit, and tie your bow.  You can adjust the gather once you put it on your ‘lil sis.

Moving on to the bodice –  This part is completely optional – you can leave them raw with imageno embellishment – but adding the ‘ribbon’ adds a little more character and allows for a
better and more customized fit –

For the neck – cut slits around the neckline (parallel to the edge – I’d say horizontal, but it curves…so ya know – go along the edge about an inch or so in from the edge.  I put my bow in the back (ADORABLE) because my shirt was so busy in the front.

For the arm holes – cut slits around the open arm holes, again parallel to the edge.  I put my bows a the top of the shoulder.

If you run out of ‘ribbon’, just cut another strip from the skirt.

My dress was made for a little one that wears a size 18 m, so I didn’t even try to make it a full length dress – because, well…that doesn’t work so great with all the climbing around at the ball park.  If you do care to sew, you can even use your discarded sleeves to make some shorts or bloomers.  I didn’t do that this time around.

I gave sweet little A’s Mama the left over  scraps from the shirts, and she tied them up into a perfectly awesome southern bow.  And I knew she would – cause she’s one of my go to gals for bows.  Didn’t she do a great job? And doesn’t she make beautiful babies?
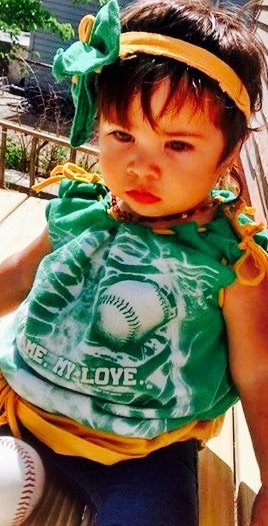
image

Super Hero Set

So, forever ago I pinned these super hero templates from Martha Stewart…it seems to be a very popular pin – I guess Super Heroes just never go out of syle!

Anywho, I tweaked them a bit – changed the sizes, made some templates of my own, and got rollin – the kiddos are absolutely overjoyed – they don’t want to take them off!

image

That was my fun sewing last week – jump in make some for your favorite supers, or if your not feeling so crafty, I’d be more than happy to make you one or two or twelve –

These are listed in my Square Shop (look under Gifts & Novelty Items) and on Etsy.

If you make some, I’d love to see!

No Sew T Shirt to Dress

It took me longer to write this tutorial than to make the dress – no joke.

Give it a shot!

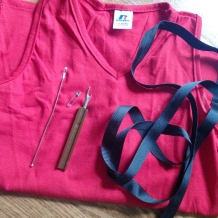
First, grab your supplies –  I started with a youth size medium sleeveless racerback T shirt – this will work with any sleeveless shirt with a binding.  We’ll try it with a regular t shirt next time…

You will also need –

  • IMG_1753Scissors or a seam ripper
  • About 3 – 3.5 yards of ribbon (1/8″ is easy to pull through – you could go up to 1/2″)
  • A Bodkin (this is a sewing tool used for threading elastic and turning things – mine is ball point) or a safety pin small enough to fit into the binding.  Make sure it’s nice and sturdy.

Grab  your scissors and start snipping:

No Sew Shirt to dress

Now grab your ribbon and bodkin or safety pin:

No Sew T shirt dress ribbon threading

A few close ups of the Ribbon Threading to help you along:

And there you go! Pull your ribbons through and tie off as desired, trim to the length you like.  I found it best to make sure the shirt is gathered in the front and not in the back – it will lay better that way.

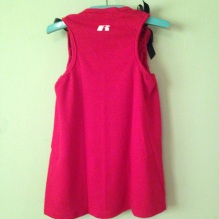
Embellish your dress, and make it awesome! Here is ours finished (though as of yet unadorned) – best pictures I could get with my ‘I’m not so much in the mood for this right now’ model –

imageimageimage

Hope you enjoy – Happy NO SEWING!!!!!

Wagon Upcycle

So…we have this wagon…it’s broken. But I love it. So…I found a way to use it.

The One with the Tools is working on building an outdoor playhouse for the littles, and, well, it needs furniture…

We got a good start… But apparently we need the The One with the Tools and not just his Tools…

He has to help us, right? Because we have this whole blog post thing going and we don’t want to leave you hangin…

Update: The One with the Tools got everything taken care of … But now we have rain. And more rain. It’s the rainy season…. Maybe next week? 4/14/15


Valentine’s Day Upcycled Dress

Because she holds the key to my heart.

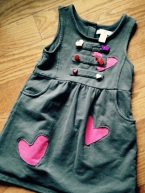
I can’t find my before picture – pretty sure it’s on my computer that crashed out last week…bygones…but here are a few in progress shots and, of course, the after cuteness. Just picture a cute but drab dress with military style buttons.  I liked it when I bought it, but knew the sparkly one would not so much.  So, we embellish…


Worked in a few hearts with a quick reverse applique –

Reverse Applique

All I did here was was cut some hearts out of pink fabric (about 1/4-1/2″ bigger than i wanted the finished heart.  Basted them on the inside of the dress in random spots with basting spray and stitched them on with pink thread.

Then, I flipped it inside out and cut out the heart on the dress just inside the stitch line to reveal the pink on the right side. Easy peasy.


I had already removed the old buttons.  My favorite is the heartimage & lock.  I actually searched and searched for that – harder to find than you might think! Thank you Etsy! I got these fabulous buttons from Threadbender64. Sewed those on in place of the original buttons – and done.  The whole project took maybe an hour? We are not counting the 2 months…or so…that it took me to actually get to it and finish it…that’s just what happens around here…but she loves it, and I do to!  Just wanted to show you how easy it is to spruce up an outfit!
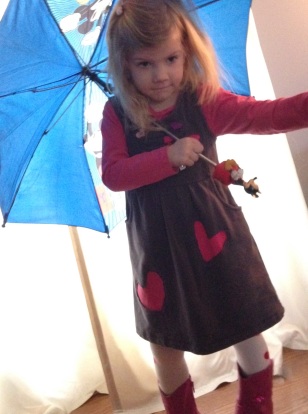
Add heart tights and some awesome boots…and voila!  Ready to go!

And, yes, the umbrella is required on bright, sunny days.

image


imageBe devoted to one another in love. Honor one another above yourselves.   Romans 12:10
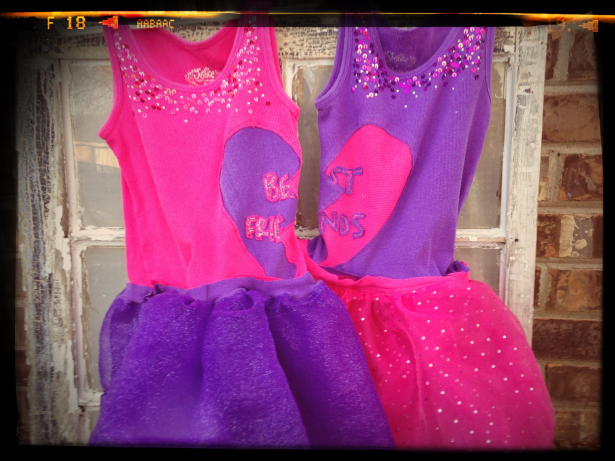


Because I can … BFFs FOREVER

Had an absolutely, marvelously wonderful time making these for a birthday gift for her BFF…IMG_0232 (1)

We have been friends since middle school, and now are our daughters are friends – so this was a very special project. I have been giddy since I finished them…

These were made by upcycling two matching tank tops donated by my nieces.  I added some sparkley mesh fabric as the skirt – each dress has pieces of the opposing tank…and I just couldn’t be happier with the way they turned out…

BEST FRIENDS FOREVER!!!

*Want one?  Custom Orders orders available in my Etsy Shop*

Or Make your own!  Here’s the PDF of the heart pattern I made for these – I traced it onto quilter’s template plastic – this can be found at most craft stores and easily online.

 CLICK HERE FOR A PDF LINK TO THE BEST FRIENDS HEART TEMPLATE HERE 


Best Friends (1)

T-Shirt Quilt Sew Along Part 7: The Binding

 This is the best part.

Because when you’re done, you’re done…

I had a plan for this one…and I made the mistake of working when I should have been sleeping. Don’t do that…but it worked out…and I think I like what I ended up with better than what I planned…

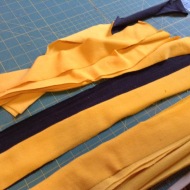
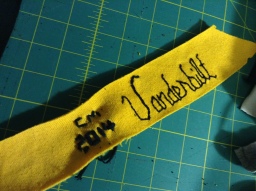
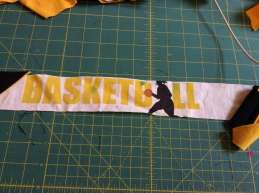
So, what I intended to do was make some diagonal strips with all of my leftover t-shirts in no particular pattern – just randomly picked up and cut into strips and sewn together…so I would have some white, grey, black, and gold in there.  Then, somewhere in the process, I would add some of those thin t-shirt pieces that I took of sleeves and shirts with smaller wording and images on them into the long strip of binding. That was the plan…

HOWEVER…due to my poor sleep habits, I somewhere came up with the idea just to do black and gold and work the t-shirt strips in…so I worked on that for a bit...hated it….went to bed. Almost in tears. It wasn’t hard…it was just…you know…unproductive….

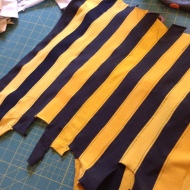
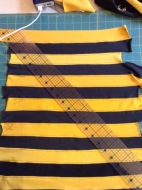
This is what I ended up with when I stopped…adorable…if you want to make a bumble bee quilt or some caution tape…

IMG_3322IMG_3323IMG_3325

So, if you want to do this, or something similar, just cut strips the same width. If you don’t want them to be the same size, cut them different widths.  They don’t have to match up in length.  Then, sew them together on the long cut edges.  If you want them to be straight, line them up straight, if you want them cut on a diagnoal, line them up with about a 1-2 inch overhang on each progressive strip.  I neglected to that on the one shown…but it will save you waste when you cut it for the binding.  Use your binding ruler, and cut it to the width you need.  I cut mine about 2.5″.  

And then threw it all in the scrap pile. Because maybe some day I’ll do a construction quilt or make a bumble be costume?  I’ll happily take a custom order for something of the sort… Sigh.  Moving on…


Here’s what I ended up doing in the end –

I cut some strips out of my leftover t-shirts, and my random skinny pieces from the shirts, cut those all the same height, and didn’t worry about the length.

IMG_3401IMG_3326

I sewed them together as if I were making a long strip of bias tape (great tutorial for that over at sew4home.com – just scroll down about to the middle of the post if you are starting with strips already).  Basically, your are going to lay the strips on top of each other at a right angle, right sides together, and then sew a diagonal line…make sure that when you open it, they form a continous strip (sounds simple, right? It is, really, I PROMISE…just do practice first if you haven’t done it before…) IMG_3399 I didn’t make a full continuous length yet – I took a few long pieces and pinned them to quilt edges to see how I liked the placement with the t-shirt pieces…
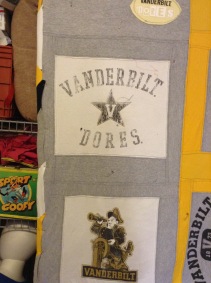
And then pinned it around in a few places and made some adjustments…I ended up working on one edge at a time…this made my life easier. Because IMG_3404making my life easier is very important sometimes. This will work on a t-shirt quilt – probably not so much on a traditional one….
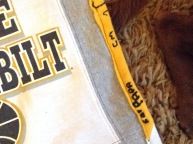
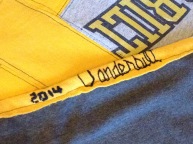
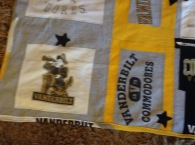
I picked an edge and started sewing. I did the sides first, then let the top and bottom binding overlap that.  I stitched over those once finished to make sure they were closed and wouldn’t get snagged…sorry, I didn’t get a picture of that – were at “go time” by now…I’ll try to get one later if you’d like to see it. You may be able to zoom in to the picture at the bottom of the post and see that?

All I did was fold it over, pin it in place and sew a straight stitch – I did not do the pressing, ironing folding over (I did press as I added the strips together). So, you I have a raw edge. It is not folded under and it is only sewn once…instead of attaching the binding, folding over and then stitching on again.  I just didn’t see that going well with t-shirt fabric…and I like the look of the raw edges.

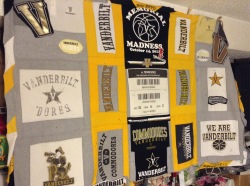
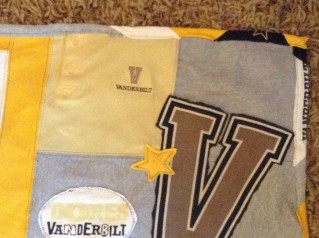
Anyway, there’s the binding…all it’s finished glory. You’ll have to wait for the next post for the big reveal and full shot of the entire quilt…because I have to tell you the story of the man behind the quilt and why I enjoyed this project so very much. So, get sewing and I’ll get that last post up soon! In that post, I’ll also share some links to helpful tutorials and tips and some final thoughts on the process.  In the meantime, I’ll bask in the glory of having actually finished this project and loving it.  It’s a a beautiful moment…

IMG_3458IMG_3459IMG_3462IMG_3460